Upgrading WordPress manually is the least-used method mainly because the automatic method is so easy and quick. In some rare circumstances, you would manually upgrade WordPress because your web-hosting environment can’t accommodate the automatic upgrade process, or maybe you just wanted to go through the experience of manually updating the software, for whatever weird reason.
The steps to manually upgrade WordPress are as follows:
Back up your WordPress website and deactivate all plugins.
Backing up your website before updating is an important step, just in case something goes wrong with the upgrade. Give yourself some peace of mind by knowing that you have a full copy of your website that can be restored if needed.
Navigate to the WordPress Update page by clicking the Please Update Now link. Click the Download button.
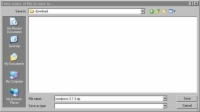
This opens a dialog box that allows you to save the .zip file of the latest WordPress download package to your local computer.
Select a location to store the download package and click Save.
The .zip file downloads to your selected location on your computer.
Browse to the .zip file on your computer and unzip the file.
Use a program such as WinZip to unzip files.
Connect to your web server via FTP.
Delete all the files and folders in your existing WordPress installation directory except the following:
/wp-content folder
.htaccess
wp-config.php
Upload the contents of the /wordpress folder — not the folder itself — to your web server.
Most FTP client software lets you select all the files and drag ’n’ drop them to your web server. Other programs have you select the files and click a Transfer button.
Navigate to the following URL on your website: http://yourdomain.com/wp-admin.
Don’t panic: Your database still needs to be upgraded to the latest version; so instead of seeing your website on your domain, you see a message telling you that a database upgrade is required.
Click the Upgrade WordPress Database button.
This action causes WordPress to initiate the upgrade of the MySQL database associated with your website. When the database upgrade is complete, the page refreshes and displays a message saying so.
Click the Continue button.
Your browser loads the WordPress login page. The upgrade is now complete, and you can continue using WordPress with all of its newly upgraded features.
During your time as a WordPress user, you’ll upgrade on a regular basis, at least three to four times per year. For some users, this is a frustrating reality of using WordPress; however, because of the very active development environment of the WordPress project, WordPress is the most popular platform available today.
Because WordPress is always adding great new features and functions to the platform, upgrading always ensures that you’re on top of the game and using the latest tools and features available.

